Snacks

Almond Kale Crackers

If the idea of making your own crackers sounds intimidating, you’re not alone. However, it needn’t be! Particularly if you are currently harvesting a lot of kale from your garden, or if you grabbed a bunch at the Farmer’s Market that you don’t have a clue what to do with, these crackers are easy, they work seasonally, and are completely NON-intimidating!! I promise.

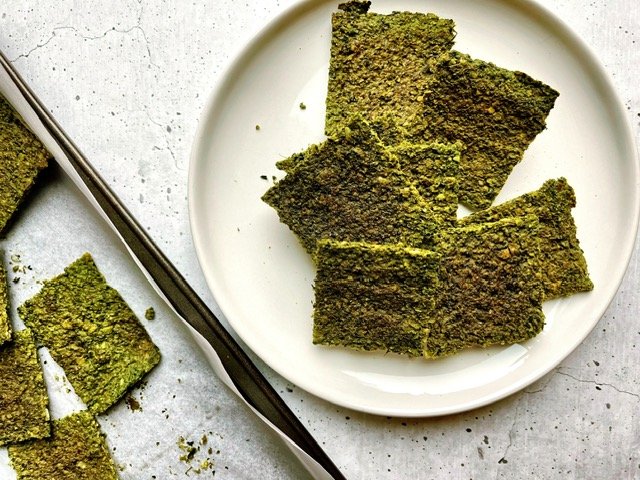
Warning: they will look brilliantly green before you pop them in the oven…

Crackers-pre-bake.jpg

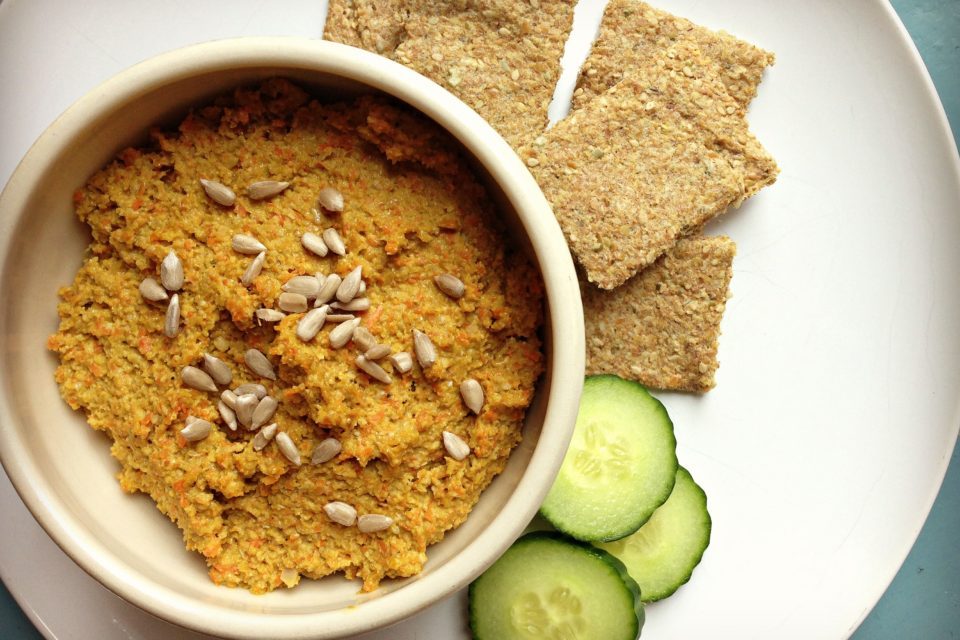
The flavours are strong in this cracker, which I love, but you can easily dial down the flavour by omitting the garlic and onion powder or cutting the quantities in half. I served these up with some herbed cashew cream cheese and sliced cucumber, which was unreal! But they would do really well with some traditional hummus, olives, and a few chunks of candied salmon. However you like to serve them, enjoy and let me know how you like them!

Almond Kale Crackers


Prep Time: 20 minutes
Cook Time: 50 minutes
Total Time: 1 hour, 10 minutes
Category: Snacks, Appetizers
Cuisine: Plant-Based, Nutrient-Dense

Yield: 20 - 28 Crackers

Ingredients

1 cup kale, packed
1/3 cup almond meal
1/4 cup freshly ground flaxseeds
½ cup sunflower seeds
2 large eggs
1/2 large white or yellow onion, grated
1 Tbsp coconut oil, solid
1 tsp onion powder
½ tsp garlic powder
1 tsp salt

Instructions

  • Preheat the oven to 300 °F and line a baking tray with parchment paper.

  • Put the kale leaves into a food processor and process until finely chopped. Add the remaining ingredients and process again to a smooth paste.

  • Using a spatula, spread the mixture onto a lined baking tray and distribute as evenly as possible.

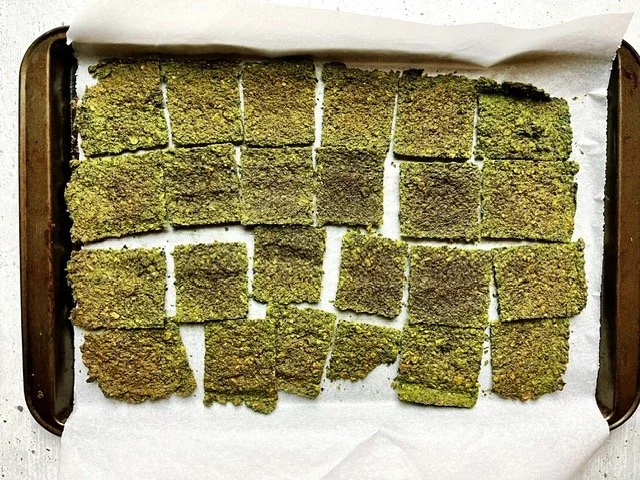
  • Bake for 25 minutes, take the crackers out and flip them entirely onto a new piece of parchment, then score into desired sized crackers with a large knife. Bake another 25-30 minutes. Allow to cool completely. Break apart into pieces by hand. Store on counter exposed to open air (they will soften in a sealed container).

If you’re looking for more ways to eat clean, your 30 Day Guided Cleanse is here!
Spring Clean your body, mind, liver, diet, kitchen, & lifestyle, and launch into the Spring Season feeling energized and rejuvenated! Receive food lists, meal plans, habit modification inspiration, liver detox guidance, reduce inflammation, increase your energy, lighten your load, AND eat delicious food the entire time ♡ Register Now! 

Simple Banana Oat Muffins

Having a teenager around means that having grab & go real food goods available makes for less standing in front of the wide open fridge door staring 🙄
While I don’t do a ton of baking, I do like to have some healthy snacks on-hand as often as possible. We are an active family and are often running out the door for a hike, bike, a climb, or a wind foiling session. When I can create recipes that I feel good about feeding my family AND that are also quick & easy to whip up, it’s just one less thing that I can not worry about, if just for a few days.

NOTE: If you don’t have oat flour, you can make it by popping oats into your food processor and blending until nice and smooth. You’ll need about 3 cups of oats for this recipe. The flour will work the same in the muffins, the texture may vary slightly.

Simple Banana Oat Muffins

Makes 14 - 16 Regular Muffins
3 large bananas
1/4 cup applesauce
1/3 cup maple syrup
2 eggs
2 tsp vanilla
2 3/4 cups oat flour
1/4 tsp salt
1 tsp baking soda
1 tsp baking powder
2 tsp cinnamon
3/4 cup good quality chocolate chips
Optional Add Ins: chopped walnuts, raisins, or hemp hearts

  • Preheat the oven to 350F.

  • In a medium bowl, mash bananas with a fork. Add all other wet ingredients and whisk together until smooth.

  • Add in the flour, salt, baking soda & powder, and cinnamon, and stir until smooth. Stir in 1/2 cup of the chocolate chips.

  • Divide your batter amongst 14 - 16 lined, regular muffin cups. Top each muffin with a few of the remaining chocolate chips. Bake for 25 - 28 minutes, or until an inserted toothpick comes out clean.

Chewy Oatmeal Cookies with Apricots & Walnuts

As you may be aware already, I LOVE me a solid cookie recipe that’s easy, comprised of all real food ingredients, quick, foolproof, and positively delicious! And here it is!

There’s nothing too fancy about these cookies, except that they have DRIED APRICOTS, which gives them a unique flavour AND enhances their nutrient punch. In our house, we LOVE organic dried apricots and eat them fairly regularly, partly because of their nutrient value, partly because we simply love them. Nutritionally, what I love about dried apricots is that they are relatively high in iron, as well as vitamin A, both essential nutrients the body needs to get through the diet regularly. They also contain some potassium & calcium, and are a good source of soluble fiber, making them supportive of good digestion. Be sure that you choose ORGANIC dried apricots, as the bright orange, non-organic ones, have been preserved with sulfur dioxide, which irritates the respiratory tract and can contribute to restricted breathing, asthma, and increased risk of respiratory infection. Look for a good organic source (they should be brown in colour) and give them a little smush to see if they are moist and soft.
Better yet, dehydrate some fresh apricots, when in season, and store them to use throughout the rest of the year (you keener you!).

Substitution Ideas:

Nut-free: Although I haven’t tried yet, you could try substituting Oat Flour for the Almond Flour and either omit the Walnuts or replace them with Sunflower Seeds or Hemp Hearts or a mix of both
Vegan: Substitute the egg with either a Chia Egg (1 Tbsp chia seeds + 3 Tbsps water) or a Flax Egg (1 Tbsp ground flaxseed + 3 Tbsp water)
Apricots: Any dried fruit would work well here: dried apples, mango, cherries, or cranberries/raisins
Coconut Sugar: Any granulated sugar will work as a substitute here, although I’m not a fan of white or brown processed sugar. A demerara/turbinado or cane sugar would be a better choice.
Chocolate-free: Not recommended 😉

Easy Chewy Oatmeal Cookies with Apricots & Walnuts

Makes about 16 Medium Cookies
1 cup almond flour
1 cup oats
¼ cup ground flaxseed
1 tsp baking powder
3/4 tsp cinnamon
1/4 nutmeg
1/2 sea salt
1/3 cup coconut sugar
1 egg (sub a chia or flax egg for vegan)
1 1/2 tsp vanilla
1/2 cup coconut oil, melted
1/2 cup chocolate chips
1/3 cup chopped walnut pieces
1/3 cup chopped dried apricots

  • Preheat oven to 350F.

  • Whisk together all dry ingredients.

  • Whisk together all wet ingredients.

  • Add wet ingredients into dry, then stir in chocolate chips. Walnuts, and apricots.

  • On a lined pan, place 1-2 Tbsp sized balls, 2-3” apart, and flatten them slightly (mix will be quite wet).

  • Bake for 13-15 minutes, until lightly browned around the edges.
    NOM NOM Cookie Time! 🍪

I would HIGHLY suggest doubling the recipe and popping half in the freezer for lunches, snacktime, or a sweet treat hankering!

ENJOY! As always, if you make these cookies, please leave me a comment below and/or take a pic & post on Facebook or IG - don’t forget to tag me!


Easy Coconut Yogourt

Decadent and delicious in that thick & sour way that yogourt is, this recipe is guaranteed to be a win, can save money on those store bought variations that are not that good, and is also incredibly gut supportive.

I’ve been making my own coconut yogourt for quite some time now and have given this recipe out countless times to workshop participants and clients. Those non-dairy folk who make it regularly, find that it opens many doors, love the versatility, and are often surprised by how easy it is to keep up with. This is one of those staple recipes that turns out every single time and is incredibly reliable.
To remind you again: this is SUPER EASY!!

About Coconut Kefir/Yogourt

The term Kefir refers to a fermented milk beverage.  Traditionally made with dairy milk, coconut kefir is much thicker with the consistency of yogourt, slightly sour, including all the health boosting goodness of a probiotic rich food.

Health Benefits of Coconut Kefir/Yogourt:

Stops sugar cravings
Aids in digestion and reduces inflammation in the intestines
Liver cleansing
High in minerals (calcium, potassium, zinc, selenium)
Cleansing effect on the endocrine system (thyroid, adrenals, pituitary, ovaries)
Increases energy
High in good quality fat
Supportive for heart health

Easiest Coconut Kefir/Yogourt

1 can full fat organic coconut milk (best brands to use for this recipe: Thai Kitchen & Earth’s Choice - the Cha brand will curdle)

1 probiotic capsule (50 billion) - if you have a probiotic with a lesser strain count, add as many as you need to make a 50 billion total

  • In your blender, blend the coconut milk can contents until smooth - don’t skip this.

  • Open the contents of your probiotic capsule (s) into a sterilized glass jar. Pour the blended coconut milk over the probiotic bacteria and stir with a non-metallic spoon or spatula until well-combined. Fasten your lid on loosely.

  • Place your jar on the counter to ferment for 24 - 48 hours (not in direct sunlight). You’ll know your yogourt has fermented long enough when there are tiny little bubbles in the top layer and it smells a little sour. You can also taste it with a non-metallic spoon to see if it has that desired sourness. Mine always takes 2 days.

  • Once the fermenting process is finished, transfer the yogourt to the fridge. It will thicken once refrigerated, so don’t worry if it seems runny.

  • Your coconut yogourt will keep refrigerated for 5 - 7 days.

My Favourite Ways to Include Coconut Yogourt in the Diet:

✓ In Smoothies
✓ Topped with fresh or frozen fruit, a drizzle of maple syrup, & chopped nuts & seeds
✓ As is
✓ With 2 Tbsp of ground flaxseeds to support hormonal health & balance, and for hormone detoxification
✓ In creamy popsicle filling
✓ As a base for creamy sauces: tzatziki, herbed dressings/dips, in avocado lime crema

ENJOY!
If you make this Coconut Yogourt, please leave me a comment and let me know how it went! ♡

Easy Vegan Cashew Pesto

Vegan Cashew Pesto.jpeg

We all look for that golden sauce that will boost and brighten a dish, especially when fresh herbs are in season and widely available. This is an easy to whip up pesto with no extra steps of toasting or soaking, that is creamy and smooth and can act as a dip, a sauce, or even a dressing. Oh and it’s rich in flavour, bright in colour, and can uplift a wearied soul in one mouth full!
We’ve been eating it by the spoonful over here - I like to spread it on a rice cake or cracker for a quick snack and my son likes it on toast. As a meal, I would serve this pesto alongside some roasted veggies, as a pasta or gnocchi sauce, over top of baked yams, tossed with roasted cauliflower, or with a piece of fish or chicken, if that’s your style.
Any way you like it, be sure to gobble it up while basil is abound and throw a few jars in your freezer for a fresh hit during the colder months.

Easy Vegan Cashew Pesto

1/2 cup cashews
3 Tbsp hemp hearts
3 cups fresh basil, packed
3 cloves garlic, minced
3 - 4 Tbsp Nutritional Yeast
Juice of 1 large lemon (1/4 cup)
1/2 tsp sea salt
2 - 4 Tbsp unsweetened almond milk

  • Place all ingredients in your food processor and blend until smooth (this will take several minutes). Store in a glass jar for 5 - 7 days in the fridge or for 1 - 2 months in the freezer.


    If you make this pesto, be sure to let me know how it turns out in the comments below! Or better yet, post a pic on IG or FB and give me a tag 😊

Banana Date Energy Cookies

Banana Energy Cookies.jpg

Inspired by an upcoming Hiking & Yoga Retreat, this cookie has so much endurance, I’m convinced it will get us up and over the Alpines with loads of energy and excitement for more adventure!
Over the years, the cookie has morphed into something very different from what it used to be. Growing up, cookies usually came in a box, were treats or rewards for good behaviour or for special occasions, and you would always grab handfuls of them (dip them in milk, maybe), and never just one. Sometimes we made cookies with white flour & white sugar, eggs, vanilla, etc. Other times, we bought that weird pre-made cookie dough that you could just cut up into rounds and throw in the oven (remember that?!) or we would eat it right out of the package with a spoon 🤢.

These days, as an adult, a Mom, an athlete, a Nutritionist, an advocate for Positive Body Image, I can’t remember the last time I bought cookies that came in a package, my son wouldn’t have a clue what I was talking about if I told him about the store bought cookie dough, and white flour or sugar doesn’t live in our home, EVER.
So cookies, to me, are an entirely different wonder!
When we have cookies lying around our house now, that same excitement takes place in the brain: we may even salivate slightly in our mouths, due to the lovely aromas, we might anticipate them being cool enough to eat, if they are baked, and we are sad when the batch is all gone. BUT it is rare for anyone to indulge in more than 1 cookie at a time. Because they are made with real food ingredients, are nutrient-dense, are high in carbohydrates, protein, AND fats, they are extremely satisfying to the senses, the belly, and the glucose receptors. This style of cookie can, not only, make you feel that sense of joy that you love, but ALSO fuel your body in just one delightful little package.
THIS COOKIE can get you through that 2 hr hike or afternoon power run, a trip to the gym, or a long afternoon at the office, I guarantee. It may even save your soul in the hours of after-school, inundated with tiny, hungry, raging monsters 😈!!

Bake Them.
Enjoy Them.
Share Them.

Banana Energy Cookies hand.jpg

Banana Date Energy Cookies

Makes 12 large cookies
Ingredients:
3 ripe bananas
1 cup dates, pitted (if hard, soak in boiling water for 5 minutes & drain)
1/4 cup coconut oil
1 tsp pure vanilla
1 tbsp honey (optional)
1  tsp cinnamon
¼ tsp baking powder
¼ tsp salt
2 cups rolled oats
2 Tbsp hemp hearts
¼ cup mini chocolate chips
¼ cup raisins

  • In your food processor, combine bananas, dates, coconut oil, vanilla, honey, cinnamon, baking powder, and salt, until well blended. Add oats to the processor and blend until combined, but not overly smooth (you want bits of oats for texture).

  • Remove mix from processor and stir in hemp hearts, chocolate chips, and raisins. Shape into rounds on a parchment lined cookie sheet and bake 350 for 20 - 25 minutes or until slightly browned around the edges.

As always, if you make these cookies & love them, please let me know AND share them around on social media! I appreciate your support as much as you appreciate yummy cookie recipes! 😋

Double Chocolate Granola Brownies

Granola brownies from above.jpg

Chocolate brownie + granola bar.
It just happened.
And it is fabulous!

This is a dense bar that’s perfect for an active day on the slopes, snack attack in the kids’ lunchbox, and a long day’s work in need of an afternoon pick-me-up! Loaded with mineral rich cacao powder, blood sugar stabilizing dates & oats, full spectrum amino acid hemp hearts, extra protein in almond butter and chopped almonds, and intensified in taste by dried cranberries and shredded coconut, I’m not convinced that this bar is missing anything! Except maybe some warm bellies 😋


As always:
no gluten,
no dairy,
no refined sugar,
no confusing food labels.
Use real food & feel real good!
You will love these, I am so super sure.

DOUBLE CHOCOLATE GRANOLA BROWNIES

Granola brownies on parchment.jpg

Prep Time: 15 minutes
Bake Time: 25 minutes
Total Time: 40 minutes
Category: Vegan, Gluten-Free, Dairy-Free, Snacks, Healthy Treat, Kid Approved
Serving: 12 medium sized bars

Ingredients:

2/3 cup medjool dates, pitted
1/2 cup almond butter, smooth or crunchy
1/4 cup maple syrup
1/4 cup coconut oil
2 tsp vanilla
1/4 cup cacao powder
1 1/2 cups oats
1/4 tsp salt
1/4 cup hemp hearts
1/4 cup dried cranberries
1/4 cup unsweetened shredded coconut
1/4 cup mini chocolate chips
For Topping:
1/4 cup melted chocolate
2 Tbsp unsweetened shredded coconut
Instructions:
1. Preheat oven to 350F. Line a medium glass dish with parchment - mine is 11 x 7”.

2. In a food processor, combine dates, almond butter, maple syrup, coconut oil, and vanilla, until well combined. Add oats, cacao powder, and salt, and process until just combined. Transfer mixture to a medium bowl.

3. Add hemp hearts, cranberries, chocolate chips, and coconut, and stir together with a wooden spoon. Transfer mixture to your lined pan and press with wet hands to evenly distribute.

4. Bake for 25 - 30 minutes until edges brown slightly. Remove from heat and allow to cool.

5. Once mostly cooled, drizzle melted chocolate over top and sprinkle with shredded coconut. Transfer brownies to the fridge to solidify before cutting into squares. Keep refrigerated.

Did you make these? Tell me how they turned out!
Want to make incredible Holiday Chocolates? Grab this Ebook today!
L
ooking for more recipes like this? Check these out!

Lemon Kale Pesto

Lemon Kale Pesto.jpg

Deep in the summer swing, with armloads of both kale and basil, this pesto came together simply (& deliciously) and has been made several times since (the kids even made it at my Kids Cooking Camp and it was an absolute success)! With the summer days sailing by as fast as they do, I haven’t had much time to post this recipe. Here it is now and, don’t worry, the basil and kale should still be in abundance for a while yet.

So far, we’ve served this up straight with tortilla chips, alongside some lovely barbeque’d salmon, on top of lentil veggie burgers with roasted yams, and in a crusty bread sandwich with roasted peppers. We’ve decided that it will pretty much get along with anyone (just my kind of spread)!

Print

Lemon Kale Pesto

Prep Time: 25 minutes

Total Time: 25 minutes

Category: Dips, Snacks, Main Meals

Cuisine: Vegan, Plant-Based, Nutrient-Dense

Kale Pesto w lemons.jpg


Ingredients

  • 4 cups kale, stemmed, chopped & loosely packed

  • Juice 1 lemon

  • 1 tsp salt

  • 2 cups basil, loosely packed

  • 3 Large cloves garlic, minced

  • 3 Tbsp nutritional yeast

  • ½ cup toasted pine nuts

  • 2 Tbsp olive oil

  • Fresh black pepper

Instructions

  1. In a medium bowl, combine kale, lemon juice and salt. Massage with hands until wilted and softened. Set aside.

  2. In a medium frying pan, toast pine nuts over medium heat until just lightly browned.

  3. In a food processor, combine all ingredients. Blend until smooth or desired consistency is reached (I like mine quite smooth - 5-7 minutes scraping sides in between).

  4. Serve with tortilla chips or crackers, along side some roasted yams or on top of baked portabellos, with veggie burgers or bbq salmon. Anyway you shake it: yum!


Try this pesto! Feed it to your kids! Tell me how it goes!

Coconut Mango Blueberry Muffins

Coconut Mango Blueberry Muffins.jpg

Mango + Blueberry + Coconut = I’m IN!!
This delicious powerhouse combo works beautifully in these muffins. What’s extra awesome, is that they are minimal ingredient and made simply with all, easy-to-find, whole food ingredients. My son’s first reaction should have been one of those funny-crazy kid youtube videos, because he was so excited about how good they were, that he had us all busting a gut in the kitchen over it. I haven’t met a kid yet who wasn’t pretty stoked on mangoes and blueberries, so these ones should be an easy sell 

If you feel like going the extra mile with this recipe, make your own almond flour by simply grinding up your favourite almonds in a dry food processor until a fine meal is formed.

Nutritional Tip: Store your almonds (and all nuts & flours) in your fridge, they will last longer and stay fresh. Once a nut gets too old, the oils start to turn. These rancid oils are at the root of many health struggles, including inflammation, cancer, atherosclerosis, Alzheimer’s, and many other damaging health conditions. Take good care of your nuts, my friends 

Print

Coconut Mango Blueberry Muffins

Yield: 12

Coconut-BM-muffins-1.jpg


Ingredients

  • 1 1/4 cups almond meal

  • 1/4 cup coconut flour

  • 1/2 tsp baking soda

  • 1/2 tsp baking powder

  • 1/2 tsp good quality salt

  • 2 eggs

  • 1/3 cup maple syrup

  • 1/4 cup coconut oil, melted

  • 2 tsp vanilla

  • 1/4 cup fresh lemon juice (1-2 lemons)

  • 2 Tbsp lemon zest (2 lemons)

  • 2 Tbsp chia seeds

  • 1/2 cup shredded, unsweetened coconut

  • 1/2 cup blueberries, fresh or frozen

  • 1/2 cup fresh mango, diced small

Instructions

  1. Preheat oven to 350F.

  2. In a large bowl, whisk together almond meal, coconut flour, baking soda, and salt. Set aside.

  3. In a medium bowl, whisk together egg, maple syrup, coconut oil, vanilla, lemon juice and zest. Stir in chia seeds and allow to set a few minutes.

  4. Pour wet ingredients into your large bowl with the flour mixture and stir until just combined (do not over-mix). Fold in shredded coconut and fruit.

  5. Distribute evenly among your lined muffin pan. Bake 25 minutes or until slightly browned and an inserted toothpick comes out clean. Cool for at least 30 minutes before serving (they will need time to set and will otherwise be crumbly). Enjoy!

Bonk Bars

Bonk-Bars-Star-.jpg

I have to admit that I have a big time soft spot for my Bonk Bars.
They were one of my first original recipes that people were really excited about. On top of that, the honest-to-gosh-golly-goodness truth is that I just LOVE them SO much. They are my absolute favourite bar to have hanging around when I’m training for a distance run, rehearsing like mad for a dance show, or just being the busy body, high-functioning human that I am. They are THE perfect afternoon slump, pick-me-up bar with all those great combinations that we love so much: macronutrient balance, nutrient-density, and total flavour jam!

These bars were inspired by a good friend who is hypoglycemic and tends to “bonk” (have a blood sugar crash inducing fits of rage and/or extreme grumpiness) if he doesn’t eat good food regularly.  Loaded with blood-sugar stabilizing fiber (dates), fats (coconut oil & chia), proteins (nuts & seeds), complex carbs (oats), and natural sweetness, these are fool-proof bars for active people, athletes, teenagers, regular “bonkers”, and sweet-treat lovers everywhere. Easy to throw together and incredibly satisfying, these will keep well for weeks in the fridge (I dare you to try) and freeze well too!
Stay grump-free.
Look out for your friends.
Prevent “Bonking”.

Print

Bonk Bars

Prep Time: 20 minutes

Total Time: 20 minutes

Category: Snack, Healthy Treat, Power Snack

Cuisine: Vegan, Real food, Nutrient-dense, Vegetarian, Raw

Yield: 16 bars

Bonk-Bar-Stack-LG.jpg


Ingredients

  • 1 cup medjool dates

  • 1 cup almond butter

  • 1 cup oats

  • 3 Tbsp coconut oil, melted

  • ¼ cup sunflower seeds

  • ¼ cup sesame seeds

  • ¼ cup pumpkin seeds

  • ¼ cup shredded coconut

  • 3 Tbsp chia seeds

  • 1/4 tsp salt

  • 1/4 cup raisins

  • 1/4 cup chocolate chips

  • ¼ cup goji berries (mulberries/golden berries)

Instructions

  1. Soak dates in boiled water until soft (about 7-10 minutes).

  2. In food processor, combine dates and almond butter until smooth. Add oats and coconut oil and pulse until roughly combined. Transfer mixture to a large bowl.

  3. Add all remaining ingredients and combine.

  4. Pour into a lined 8 x 8 square pan and press down with wet hands until evenly distributed and smooth.

  5. Refrigerate for at least 1 hour before cutting into squares. Store in fridge.


If you try these Bars and love them (or not), let me know how they worked out for you!!

Love these? Want more recipes like this? Check these out:
Sesame Chocolate Power Balls

The Ultimate Cookie

Easy Chewy Granola Bars

Granola-bars-.jpg

It’s taken me a good while and several tries to come up with a granola bar recipe that is full of good stuff, stays chewy, and is quick and easy to throw together. Here it is. These are super popular with the kiddos, my active lady friends, and the backcountry boys alike.  This is a dependable, fool proof recipe, that turns out well every time.  Feel free to experiment and add your own flare!
Note: if your kids can’t bring nuts to school, simply swap out the almond butter for sunflower seed butter, pumpkin seed butter, or tahini!

Easy Chewy Granola Bars

Granola bar single.jpg

Ingredients

1/2 cup almond butter
1/2 cup honey
2 tsp vanilla
2 tsp cinnamon
Good pinch of salt (1/4 tsp)
2 Tbsp coconut oil, melted
1/8 cup coconut sugar
1/2 cup pumpkin seeds
1/2 cup shredded unsweetened coconut
2 cups oats
1/2 cup dried cranberries
1/2 cup good quality (high cacao content) chocolate chips
1/4 cup water

Instructions

  • Preheat oven to 350F and line an 8 x 8 pan with parchment.

  • Combine almond butter and honey in a small saucepan over low heat until just melted. Remove from heat and transfer to a large mixing bowl.  Add in all remaining ingredients, stirring until well-combined (I will often use my hands for this).  If the mixture seems dry, add a few Tbsps of water at a time until desired consistency is reached.

  • Pour mixture into your lined baking pan and press down with wet hands until evenly distributed. Bake for 30-45 minutes until edges are slightly browned.  Cool completely and cut into squares (I like to pop it into the freezer for 10 minutes before cutting).  Will keep refrigerated for up to a month.


Curried Sunflower Seed Spread

sunflower-dip-w-crackers-.jpg

Here’s a pretty simple, easy to bang-off, “dinner party impresser” of a spread.  The only real pre-emptive here is that the sunflower seeds need to soak for a few hours before hand.  I love to use seeds as a base for sauces, dressings, and spreads, because they are nutritional powerhouses, high in protein, and super satisfying.  I’ve got big respect for the sunflower seed; they make great seed butter, are high in magnesium, vitamin E, selenium, support the cardiovascular system, help regulate mood, and are an excellent source of good quality fat.

Note: always keep your seeds refrigerated to preserve the integrity of the oils and to keep them fresh and tasting scrumptious.

Curried Sunflower Seed Spread

Ingredients

1 cup sunflower seeds, soaked 2 hour minimum
1 cup carrots, roughly chopped
1 inch fresh turmeric, minced
1.5 inch fresh ginger, minced
1/3 cup cashew butter
1/2 tsp salt
1/2 tsp curry powder
1/4 tsp cumin
1 Tbsp tamari
Fresh ground pepper to taste

Instructions

  • Drain and rinse sunflower seeds and place them in the bowl of your food processor along with all other ingredients. Process until smooth (this will take about 5 minutes), scraping sides frequently with spatula.

  • Serve with chopped veggies and homemade crackers or use as a filling in a tortilla or nori wrap.

  • Will keep refrigerated for up to 7 days.

Coconut Banana Muffins

Banana-Muffins-tray-.jpg

Our summer has finally chilled out enough to turn my oven back on and it’s good timing because my boys were craving some muffins and I was dying to create.  I also happened to have some pretty brown, fruit fly lovin’, bananas begging to be a part of something fantastic!

These muffins are vegan, gluten-free, and as sweet as brown are your bananas! (The browner the better). Note: if your bananas aren’t quite there yet, pop them in a brown paper bag overnight to quicken the ripening period.

Coconut Banana Muffins

single-muffin.jpg

Ingredients:

2 cups DIY gluten free flour blend (I use this one)
1 tsp baking powder
1 tsp baking soda
1/2 tsp himalayan sea salt
4 large, very ripe, bananas
1/2 cup coconut sugar
1/4 cup coconut oil, melted
1/2 cup coconut cream (if you don’t have any coconut cream, scoop off the cream from a can of coconut milk)
2 tsp vanilla extract
1 cup shredded, unsweetened, coconut (1/4 cup reserved)
1/3 cup high cacao content chocolate chips

Instructions:

  • Preheat oven to 350F. Line muffin tin with parchment paper or reusable silicon liners.

  • In a large bowl, combine the flour, baking soda, baking powder, and salt, and whisk together.

  • In a medium bowl, mash bananas with a fork. Add in sugar, oil, cream, and vanilla, and combine. Pour wet mixture into dry and stir with a large spoon.  Stir in 3/4 cup of shredded coconut and chocolate chips.

  • Spoon muffin mix into the tins and sprinkle with remaining coconut.

  • Bake for 22-25 minutes until slightly brown around the edges and an inserted toothpick comes out clean.

  • Cool completely and store covered with a dish towel to enable air circulation.

Note: I like to set half the batch aside to freeze for lunches and watch the others get devoured in just a few days. Enjoy!

Sesame Chocolate Power Balls

Sesame-Choc-balls-.jpg

These little babies were inspired by the need for more protein packed lunchbox snackeroos for the little kiddos who can’t pack nuts in their lunches due to school specifications. I came up with these easily, as they’re super quick to whip together, they contain staple ingredients that live in my kitchen, and I love love love the combo of sesame and chocolate: salty-sweet-earthy deliciousness!

Designed with the littles in mind, these are full of protein, beneficial fats, fibre, calcium, magnesium, and immune boosting antioxidants, they are perfect for an afternoon boost without the blood sugar crash of refined sugar. They are not to be reserved just for your kids though, so hide a couple in the back of the fridge and try them out mid-afternoon when you’re feeling sluggish and unfocused, they are sure to satisfy in many ways! Enjoy!!

Sesame Chocolate Power Balls

Yield: 12 - 16 Balls

Sesame-ball-single.jpg

Ingredients

  • 1 c dates, soaked in hot water for 10 minutes

  • 1/2 cup raw tahini

  • 1/4 cup hemp hearts

  • 1/2 tsp salt

  • 1/2 cup cacao powder

  • 1/4 cup dried cranberries

  • 1/3 cup toasted sesame seeds

Instructions

  1. Toast sesame seeds in a hot, dry, frying pan over medium heat until lightly brown. Remove from heat and empty onto a small plate and set aside.

  2. In a food processor, combine soaked dates, tahini, hemp hearts, salt, and cacao. Blend until smooth and well combined.

  3. Add dried cranberries to processor and pulse a few times until they are incorporated, but not blended.

  4. Using clean hands, roll 1-2 tbsp of mixture in your hands until a smooth ball is formed. Roll each ball in toasted sesame seeds until completely coated (or just coat half). Place onto a cookie sheet.

  5. Place finished balls into the fridge until firm (2-4 hours). Store refrigerated. Will keep 3-4 wks in fridge or 6 months in the freezer.


Be sure to let me know how these work out for you!

Easiest (Make It Anywhere) Guacamole

Guacamole.jpg

When we are travelling to warmer climates during the winter, chasing the sun and yearning to stand by the ocean’s side, feeding my family well can sometimes be a challenge. I often find myself leaning back on my basic knowledge and training, being creative without being too bold, as my kitchen tools and ingredients are much more limited than at home.

The biggest part of eating well on a vacation, is to source out good local food. I will generally begin this process before we travel, searching for farmer’s markets or local farms, Health food stores or best traveller store reviews. My husband is a lot more bold than I am with new people, so he’s great to have on holiday (for many many reasons  ), as he’s pretty breezy about chatting up the locals to find out where we can get our hands on some organic fruits & veggies and if there’s anywhere to find fresh fish.

When putting meals together, I tend to rely on a few staples, although it will depend what’s in season wherever we are. Avocados tend to be easy to find in the warmer climates, limes, garlic & tomatoes, too. Once I know I can put together some easy guac, than the doors open up for lots of meals & snacks.

I’ve been making guacamole for as long as I can remember being capable in the kitchen. It has gotten better over the years, I must admit. For me, guacamole tends to be a little of this and a little of that, mash it all up and give it a taste, kinda thing, but I thought I’d write a recipe out for those of you that don’t like to wing it  or are still building your kitchen confidence. This one’s for you!

Print

Easiest (Make it Anywhere) Guacamole

Prep Time: 10 minutes

Total Time: 10 minutes

Category: Dip, Snacks, Appetizer, Vegan, Gluten-free, Dairy-free

Cuisine: Vegan, Real food, Nutrient-dense

avocado.jpg

Ingredients

  • 1 large, ripe avocado

  • Juice of 1 lime

  • 1 clove garlic, minced

  • 1 Tbsp minced red onion

  • 1 medium tomato, diced

  • ½ tsp cumin

  • ½ tsp salt

  • Freshly ground pepper

Instructions

  1. In a small-medium sized bowl, mash avocado and lime juice with a fork.

  2. Add garlic, onion, tomato and spices and mash further with a fork.

  3. Serve immediately.


Our favourite dishes with Guac? Fish tacos, veggie burritos, guac & chips, baked yams with guac, morning eggs’n guac, and layered guac’n bean dip. Be creative. Or don’t. But do try this Guac recipe, it’s a hit every time!


10 Minute Hemp Chocolate Energy Balls

hemp-choc-energy-balls-.jpg

Quick, easy and packed with high-end nutrition, these little powerhouse balls are designed to pick you up from the afternoon blahs, re-charge your energy supplies after a good workout/run, and for little lunchboxes labelled: afternoon treat.

Use them however you need them, but be sure to treat them with love, as high quality ingredients are oh-so-necessaire with powerhouse snacks. Our goal here is to tell the body that with this one, little, satisfying dose of food, we can gain a good dose of clean energy, some protein to rebuild and maintain muscular strength, good fat for the brain & for a happier mood  , and some full mineral cacao to nourish our cells.
What more is needed?
De Nada.

What we LOVE about hemp hearts:

hemp-hearts.jpg
  • They are high in GLA (Gamma-Linolenic Acid), incredible for proper hormone function

  • They are anti-inflammatory, useful for everyone, but particularly beneficial for those who suffer from inflammatory related illness (cancer, arthritis, GI disease, asthma, cardiovascular disease)

  • Useful in weight-loss: these little cuties are packed with fibre, healthy fats & protein, so they are excellent at fuelling the body in the right way, igniting satiety signals and allowing you to stay full and satisfied for longer

  • Digestive & Immune supportive: high in both soluble and insoluble fiber, hemp hearts can help you move your bowels regularly (good for those who bung up easily  ) and provide immune support through feeding the healthy bacteria in your gut

Enjoy these lovelies and remember: if you make them, do let me know how much you loved them!

Print

10 Minute Hemp Chocolate Energy Balls

Prep Time: 10 minutes

Total Time: 10 minutes

Category: Snack, Energy Snack, Post-Workout

Cuisine: Vegan, Real food, Nutrient-dense, Vegetarian

Yield: Aprox. 16 Balls

chocolate-hemp-balls-2.jpg

Ingredients

  • 1 cup dates, pitted & soaked in boiling water for 5-8 minutes

  • 1/2 cup almond butter

  • 1/4 cup hemp hearts + 3 Tbsp for rolling

  • 2 tsp vanilla

  • 2 Tbsp cacao powder

  • 2 Tbsp coconut oil, melted

  • 1/4 tsp salt

  • 1/4 cup dried cranberries

  • 1/4 cup mini chocolate chips

Instructions

  1. Drain softened dates. Transfer sweetened date water to a glass jar and reserve for smoothies or sweet drinks - keep refrigerated up to 3 or 4 days.

  2. Place dates, almond butter & vanilla in your food processor and blend on a medium setting until a sticky, dough-like consistency forms (you may need to stop and spread the mixture evenly in the processor a few times with a spatula). Add hemp hearts, cacao, coconut oil & salt and blend until well incorporated.

  3. Add cranberries and chocolate chips and blend once more until well combined.

  4. Roll into balls of your preferred size (mine were about 1.5 inches round) and coat in reserved hemp hearts (or sifted cacao, shredded coconut, or chopped nuts/seeds) and place onto a lined cookie sheet and transfer to the fridge. Allow to set at least an hour, overnight is preferable. Store in a sealed container in the fridge for up to 3 weeks. ENJOY!!


3 After-School Smoothies Your Kids Will Love

blackberry-smoothies-.jpg

Every parent is familiar with the after school blood sugar crash. The kids come home from school, rockin’ the grumps, dragging their feet, dumping their backpacks and mitts and hat and jacket and whatever else they’ve got all over the floor while they whine that they are SOOOOOOOOOO hungry! They “can’t handle anything” and must eat right this minute!
When you make a suggestion, they let out an exasperated sigh and give you the look of hangry death.

I hope you are laughing (and not crying) by now, because you’ve seen this a thousand times.

Well, fellow Feeding-Hangry-Kids Enthusiasts, I’ve got a plan for you:

Make it a smoothie.
In fact, let them make it themselves. 

We’ve been on the after-school smoothie train here for a while and let me tell you, it’s changed the atmosphere in our house considerably. Ok fine, so the dumping of all the clothing is still a work-in-progress (you got me there), but my son will often come in from school and head straight for the freezer. He’ll pull out whatever frozen fruit we have and line up some other tasty ingredients on the counter (often coconut milk, hemp hearts, almond butter, vanilla, cacao) and hit up the blender. It is such an effective way to nip the hangry quickly, deliciously, and plus, he’s become quite the smoothie maker (we are still working on the cleaning up part  ).

Here are some of our favourite recipes that have become staples over the last few years. I will often use these recipes with Kids Cooking Camps and after-school programs and the kids love to try coming up with their own creations. I believe that giving kids some reins in the kitchen early is a great way to set them up with the desire to cook. It also nurtures a more connective relationship with food and provides them with some basic guidelines for good nutrition & a general set of kitchen skills.

Good Morning Sunshine

1 ½ cup spinach (or other leafy greens)
1 cup coconut water
1 orange, peeled and diced
1 cup frozen mango or pineapple or a mix of both
Juice of 1 lime
Pinch of salt

  • Place all ingredients in your blender and blend until smooth.

Strawberry Shortcake Smoothie

1 cup frozen strawberries
1 cup coconut milk
¼ cup grated beets
1-2 handfuls of chopped spinach
2 Tbsp hemp hearts
1-2 Tbsp honey (optional)
1 Tbsp coconut oil
1 tsp vanilla

  • Place all ingredients in your blender and blend until smooth. Serve immediately. Makes 2-3 servings.

chocolate-smoothies.jpg


Afternoon Pick-Me-Up Chocolate Smoothie

½ cup coconut milk
½ cup water
2 Tbsp cacao powder
Pinch salt
½ – 1 whole banana
1 pitted medjool date
2 Tbsp almond butter
1 Tbsp coconut oil
A few ice cubes

  • Place all ingredients in your blender and combine until smooth.

Stay SMOOTH & Don’t let the After-School Hangrys get you down!

Like always, if you try these smoothies and love them, please let me know!!
Better yet, take a pic and tag me on facebook or instagram!

Looking for more healthy kid inspiration?