Breakfast

Easy Coconut Yogourt

Decadent and delicious in that thick & sour way that yogourt is, this recipe is guaranteed to be a win, can save money on those store bought variations that are not that good, and is also incredibly gut supportive.

I’ve been making my own coconut yogourt for quite some time now and have given this recipe out countless times to workshop participants and clients. Those non-dairy folk who make it regularly, find that it opens many doors, love the versatility, and are often surprised by how easy it is to keep up with. This is one of those staple recipes that turns out every single time and is incredibly reliable.
To remind you again: this is SUPER EASY!!

About Coconut Kefir/Yogourt

The term Kefir refers to a fermented milk beverage.  Traditionally made with dairy milk, coconut kefir is much thicker with the consistency of yogourt, slightly sour, including all the health boosting goodness of a probiotic rich food.

Health Benefits of Coconut Kefir/Yogourt:

Stops sugar cravings
Aids in digestion and reduces inflammation in the intestines
Liver cleansing
High in minerals (calcium, potassium, zinc, selenium)
Cleansing effect on the endocrine system (thyroid, adrenals, pituitary, ovaries)
Increases energy
High in good quality fat
Supportive for heart health

Easiest Coconut Kefir/Yogourt

1 can full fat organic coconut milk (best brands to use for this recipe: Thai Kitchen & Earth’s Choice - the Cha brand will curdle)

1 probiotic capsule (50 billion) - if you have a probiotic with a lesser strain count, add as many as you need to make a 50 billion total

  • In your blender, blend the coconut milk can contents until smooth - don’t skip this.

  • Open the contents of your probiotic capsule (s) into a sterilized glass jar. Pour the blended coconut milk over the probiotic bacteria and stir with a non-metallic spoon or spatula until well-combined. Fasten your lid on loosely.

  • Place your jar on the counter to ferment for 24 - 48 hours (not in direct sunlight). You’ll know your yogourt has fermented long enough when there are tiny little bubbles in the top layer and it smells a little sour. You can also taste it with a non-metallic spoon to see if it has that desired sourness. Mine always takes 2 days.

  • Once the fermenting process is finished, transfer the yogourt to the fridge. It will thicken once refrigerated, so don’t worry if it seems runny.

  • Your coconut yogourt will keep refrigerated for 5 - 7 days.

My Favourite Ways to Include Coconut Yogourt in the Diet:
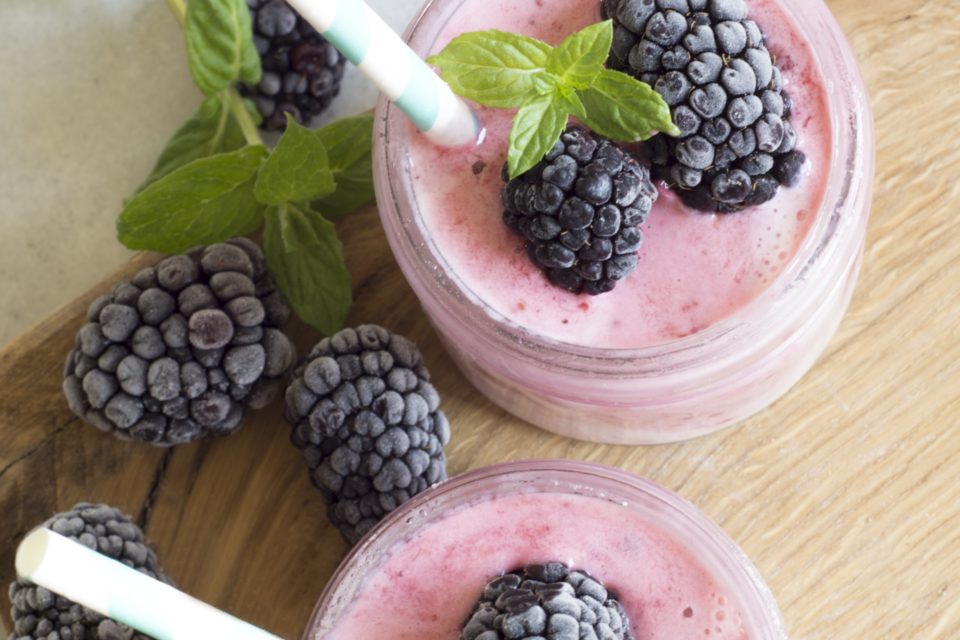
✓ In Smoothies
✓ Topped with fresh or frozen fruit, a drizzle of maple syrup, & chopped nuts & seeds
✓ As is
✓ With 2 Tbsp of ground flaxseeds to support hormonal health & balance, and for hormone detoxification
✓ In creamy popsicle filling
✓ As a base for creamy sauces: tzatziki, herbed dressings/dips, in avocado lime crema

ENJOY!
If you make this Coconut Yogourt, please leave me a comment and let me know how it went! ♡

Morning Apple Cinnamon Oatmeal

Apple Oatmeal 2.jpg

Need something new on your breakfast rotation?
I’ve been making this oatmeal for my family quite a long time and it feels like the right time to share it with you!

This recipe is super easy, uses ingredients you’ll likely have on hand, and is a very nourishing and delightful breakfast that all family members love. Stewing the apple chunks first is really what sets this oatmeal apart, so be sure to leave a bit of time to let the apples cook through until softened before adding in the oats. Once the oatmeal has cooked, don’t skip adding in those protein & beneficial fat-packed hemp hearts & chia seeds, and any additional nuts, seeds, ground flax, or fresh fruit you choose. These add ons push this simple meal into a more satiating and blood sugar balancing department to get everyone through a good morning feeling balanced, energised, and focused!

Happy Breakfast Making!

Looking for more Breakfast Tips? Read about Conquering the Breakfast Scramble here!

Morning Apple Cinnamon Oatmeal

Apple Oats.jpg

Serves 2
Cook time: 20 minutes
2 medium apples, peeled, cored and cubed
2 Tbsp coconut oil
1/4 tsp salt
1 tsp cinnamon
2/3 cup rolled oats
3/4 cup almond milk
1/4 cup water
1 tsp vanilla
2 Tbsp hemp hearts
2 Tbsp chia seeds
1/4 cup raisins
1 Tbsp maple syrup
Coconut kefir or yogourt or milk for serving
Optional add ins: ground flax, chopped nuts or seeds, fresh fruit

  • In a small sauce pan, warm apple chunks and coconut oil over a medium heat. Once hot, add salt and cinnamon and continue to cook, stirring often, until apple is softened (this will take a few minutes, approx: 7-10). Add oats and stir, toasting them slightly (about 2-3 minutes). Add milk and water and bring to an active simmer, stirring occasionally, until all the liquid is mostly absorbed (about 10 minutes). Remove from heat.

  • Stir in vanilla, hemp heart, raisins, and maple syrup. Serve with coconut kefir/yogourt, or with a drizzle of almond milk over top and any add ins your lovely sleepy head desires.

    If you make this oatmeal, please let me know how much you love it or what you did differently to make it your own! AND be sure to sign up for my Newsletter and don’t ever miss a new recipe or a new class offering ♥️

My Everyday Morning Power Smoothie

Berry Smoothi.jpg

After jumping on the Cancer Prevention band wagon, over a decade ago, I had myself on so many supplements and liquid formulas; I was juicing, and downing algae, consuming a LOT of powders and pills, and pulling my hair out trying to decide how to keep my body cancer free while keeping up with the expense and dedication to all the pill popping, powder pounding, and herbal shots I was on.
In the end, it wasn’t manageable long-term and I came to the realization that freaking out and experimenting with 100 supplements a day for a time period, was just a stage in the big process. Eventually, I learned how to stay calm, to prevent Cancer daily with regular regimes that were doable, that it was actually more beneficial to eat real foods and supplement sparingly and wisely, to prioritize rest and stress management, in order to fully heal and find a sustainable way forward.

One of the regimes I’ve held onto since then is the morning power smoothie and I cheerlead for it so loudly, that pretty well all my clients are pounding back the power smoothie every morning too.
Here’s the thing, you can get almost anything into a smoothie, if you’ve got a solid (and yummy) base to work with. And although I don’t advocate for out of control and/or random supplementation, there are a few that I swear by in order to keep those micro & essential minerals and vitamins at levels that help the body to thrive. It seems we can’t get around the vitamin & mineral depletions in a world where our output is so high and the toxicity levels unavoidable, that our body has to fight hard to consume enough, and utilize properly, all the vitamins & minerals it needs for optimal function. Supplementing smartly, with real food formulas, IS something I feel can greatly support better health and disease prevention long term.

As with everything I advocate for, the morning smoothie is entirely individualized according to the individual’s needs. For example, I may have a client add maca powder to aid with menopausal symptoms, or offer that another add moringa leaf powder to bring her iron levels up; we may decide that a distance runner needs a pumpkin seed powder boost to increase zinc and magnesium levels for recovery, and an autistic child would benefit from extra real food additions & protein, etc. So, individualize your own morning smoothie to suit YOUR NEEDS as you see fit. What I offer here is a base formula that you can change in whatever ways feel right for you.

Your Key Components to a Morning Power Smoothie

  • All Macronutrients: Number 1 rule with composing a smoothie is to be sure it contains Protein, Carbohydrates, AND Fat. This is what I call the “Magic 3 Combo” that will help support blood sugar stability, increase energy and endurance levels, will aid with mood and mental focus & clarity, and help keep the body full for longer.

  • Greens Powder Formula: Dried, real food, greens are an amazing way to add vital vitamins & minerals to your morning. Extra greens will aid with regular detoxification, elimination, with cell function & repair, will support regular Cancer & Disease Prevention, as well as all organ function. Look for a formula that does not contain additional flavours or additives that you don’t recognize as real food. The one I use is made by Enerex (I have no affiliation with this company, I just like the blend and can buy it locally).

  • Vitamin/Mineral Formula: Now being in my forties and accepting the fact that my body just doesn’t have the same stamina, endurance, and capability to recover as it used to, I want to be sure that I am getting all those additional vitamin/mineral requirements that I know are harder than ever to receive & absorb through real food sources. I have turned on to this real food supplement company that makes supplements ALL from organic, dried real food sources and I just LOVE that adding a daily scoop to my morning smoothie eases my mind a little knowing that I am, in the least, getting a good does of vitamins & minerals in this one meal. It’s called Women’s Pure Food A to Z, made by Pranin Organic (I do have an affiliation with this company, the ONLY one I have because I love it so much!). If you purchase, use discount code: cindy 😊

  • Berries: All berries are packed with antioxidants, which are potent cancer fighting, free radical neutralizing nutrients that are a DAILY MUST. We pick ours in the summer from the local organic farm and freeze them in ready-to-use containers so that we don’t have to buy them in plastic during the winter months. Any berry will do here: blueberries, blackberries, strawberries, huckleberries, etc. all are nutrient & antioxidant powerhouses.

  • Tahini: If you didn’t already know, tahini is a bit of an underdog in the world of nutrition. This superstar seed butter is PACKED with nutrition that every one needs! High in protein, healthy fat, calcium, selenium, iron, zinc, just a Tablespoon or two in your morning smoothie can give you a daily health kick like no other.

My Everyday Morning Power Smoothie

1 cup coconut water (electrolytes)
1/2 banana (carbohydrate)
1 cup blueberries/mixed berries (carbohydrate, antioxidants)
1-2 Tbsp tahini (protein, fat, minerals)
1-2 Tbsp hemp hearts (complete protein, fat)
1/4 cup coconut kefir (ideal) or coconut cream/milk (fat, probiotics)
1 scoop greens powder (minerals/vitamins)
1 scoop Pure Food formula (minerals/vitamins)
Personalized Add Ins (maca, mushroom blend, probiotics, ashwaghanda, goji powder, etc.)

  • Place all ingredients in your blender and combine until smooth.

Smoothie on people.
Live well, eat well, drink a smoothie a day.
Feel awesome.

Morning Endurance Muffins

Muffins.jpg

This is my version of a morning glory muffin, but packed with a higher nutritional punch. We love these beauties because they are both robust and delicious and can get you through the morning hours without that blood sugar dip often associated with a morning muffin. As usual, the real food ingredients provide enough nutrition and macronutrient balance that the body will feel nourished and well fed. Yes, there are sweeteners in this muffin, but both maple syrup and coconut sugar are real food sugars with antioxidants, immune benefits, and lower glycemic index ratings.


Feel free to modify this recipe however you feel. If you are looking for a nut free version, simply remove the pecans and swap out the almond flour for a similar replacement flour such as sunflower seed flour (you can easily make this by blending sunflower seeds into a flour/meal in your food processor).


We love these muffins served warm, cut in half, with some coconut oil or almond butter, but straight up is perfectly lovely 😋

Morning Endurance Muffins

Muffins 3.jpg

Makes 12 - 16 muffins
Vegan, Gluten-free, Dairy-free, Plant-based, Super Yum

Ingredients:
2 chia eggs (2 Tbsp chia seeds + 6 Tbsp water)
1 overripe banana
1/3 cup maple syrup
1/4 cup applesauce
1/2 cup coconut sugar
1/2 cup almond milk (or other plant based milk)
1/4 cup coconut oil, melted
1 small apple, cored & grated
1/2 tsp salt
1 1/2 tsp baking soda
1 tsp cinnamon
1/2 tsp ground ginger
1/2 cup almond flour/meal
1 cup oat flour
1/2 cup oats
1 cup grated carrot
1/2 cup shredded coconut
1/2 cup raisins
1/2 cup pecans, roughly chopped
1/4 cup hemp hearts

Instructions:
To make your chia eggs, combine chia seeds and water in a small bowl and set aside.
Preheat the oven to 375F.
In the bowl of your food processor, place banana, maple syrup, applesauce, coconut sugar, milk, oil, grated apple, salt, baking soda, and spices and combine until smooth. Add flours, oats, and grated carrot and blend again, until just combined. Stir in remaining ingredients.
Spoon batter out evenly into lined muffin tins (12 - 16 muffins, depending on tin size).
Bake for 35 - 40 minutes, or until an inserted toothpick comes out clean and muffins are slightly browned on the outside. Cool & serve.

If you make these muffins, please let me know how they turn out for you AND if you make some modifications let us all know how they worked!! Happy Baking 💛

Butternut Quiche with Caramelized Onions

Quiche slice.JPG

This beautifully flavoured quiche is a wonderful dish for a crowd or a special Sunday morning brunch. I recently served this up to a group at a retreat, and they were SO in love that they have inspired me to share the recipe on the website.
You will need a bit of time to caramelize the onions and roast the squash, but the steps in this dish are so worth the time commitment 😉
As always, feel free to modify the recipe to suit your taste buds and preferences. You can easily swap out the butternut for a different squash or add sautéed mushrooms and/or sun-dried tomatoes. Keep in mind that because the onions are caramelized, there is a bit of a sweet taste to this quiche, so modifying too much might work against you.

Butternut Quiche with Caramelized Onions

quiche in pan.JPG

Serves 6
Dairy-free, Gluten-free

1 medium onion, sliced
1 Tbsp avocado oil
2 Tbsp balsamic vinegar
1/2 small butternut squash, cut into 1/2” cubes
2 Tbsp coconut oil
Salt & pepper
7 eggs
1/4 cup full fat coconut milk
1/2 teaspoon salt
½ tsp dried sage
1/4 tsp dried thyme
¼ cup nutritional yeast
1 cup packed fresh spinach, chopped
Fresh parsley, green onion, tomato slices, and/or avocado for serving

  • Preheat oven to 400 degrees.

  • Slice one large onion and place into a large saucepan. Add avocado oil and balsamic vinegar. Cook the onion slices on medium/high, stirring frequently. Once the onions start to get translucent, turn the heat to medium/low and cook until they start to caramelize. This will take roughly 30 minutes.

  • While the onions are cooking, cut the butternut squash into 1/2″ cubes and place in an 8x8 glass dish, coat with 2 Tbsp coconut oil and season with salt and pepper.

  • Roast the squash for 20 - 25 minutes, until slightly softened.
    Once squash is done, lower the oven temperature to 375 degrees.

  • Let the squash and onions cool slightly. Combine the eggs, coconut milk, spinach, dried herbs, butternut squash, and caramelized onions in a large bowl. Mix well then pour back into your 8x8 glass dish still greased from the squash.

  • Bake for 45-55 minutes, or until the centre of the quiche is set - you can check by simply wiggling the pan slightly to see if the eggs are firm. Serve with parsley, green onions, fresh tomato, and/or sliced avocado.

    If you make this recipe, please leave me a comment and tell me how it turned out for you!! I’d love to hear from you 😊

Thick Coconut Vanilla Chia Pudding

Chia pudding glass jar small.jpg

Chia pudding has got to be one of the simplest ways to make a yogourt style substitute without hardly any effort at all! I like to make a batch at the beginning of the week for quick and easy breakfast and/or snacks throughout the week.  It’s a great late morning snack to take with you on the go or to pop into your child’s lunch with a sprinkle of granola and fresh fruit.

It takes about 5 minutes to make and is a nutrient powerhouse, especially if you’ve had time to whip up your own Vanilla Cashew Coconut Milk (bonus points!) 😉

What we LOVE LOVE LOVE about Chia Seeds:

High Quality, Plant Protein
Supportive to Digestion & GI Tract Repair
Protective of Heart & Supportive of Cardiovascular Health
High in Antioxidants - Protective Against Brain Degeneration & Cancer
High in Fibre & Omega 3s
High in Minerals: Iron, Copper, Manganese, Phosphorus, & Zinc
Particularly High in Potassium, Calcium & Magnesium: Good for Bone Health & Development
Beneficial for Blood Sugar Stability & Diabetes
Beneficial for Athletes: Supports Metabolic Function, Strong Energy Levels & Endurance

Thick Coconut Vanilla Chia Pudding

1 can full fat coconut milk
½ cup almond milk
2 tsp vanilla
2 Tbsp maple syrup
1/3 cup chia seeds
Note: for Chocolate Chia Pudding, add 2 Tbsp cacao powder

  • Combine all ingredients in your blender, except chia seeds, until smooth. Pour chia seeds in to the bottom of a large glass mason jar and pour blended milk over top. Stir well with a spatula and place in the fridge.

  • Chill for about an hour, then return to the jar and stir again, making sure to stir up chia seeds that have pooled in the bottom. Chill for at least 4 hours, overnight is better.

  • Serve cold sprinkled with fruit, your favourite granola, or nuts and seeds.

Other Recipes that use Chia: Hippie Trail Cookies, Coconut Mango Blueberry Muffins 😋😋

Bonk Bars

Bonk-Bars-Star-.jpg

I have to admit that I have a big time soft spot for my Bonk Bars.
They were one of my first original recipes that people were really excited about. On top of that, the honest-to-gosh-golly-goodness truth is that I just LOVE them SO much. They are my absolute favourite bar to have hanging around when I’m training for a distance run, rehearsing like mad for a dance show, or just being the busy body, high-functioning human that I am. They are THE perfect afternoon slump, pick-me-up bar with all those great combinations that we love so much: macronutrient balance, nutrient-density, and total flavour jam!

These bars were inspired by a good friend who is hypoglycemic and tends to “bonk” (have a blood sugar crash inducing fits of rage and/or extreme grumpiness) if he doesn’t eat good food regularly.  Loaded with blood-sugar stabilizing fiber (dates), fats (coconut oil & chia), proteins (nuts & seeds), complex carbs (oats), and natural sweetness, these are fool-proof bars for active people, athletes, teenagers, regular “bonkers”, and sweet-treat lovers everywhere. Easy to throw together and incredibly satisfying, these will keep well for weeks in the fridge (I dare you to try) and freeze well too!
Stay grump-free.
Look out for your friends.
Prevent “Bonking”.

Print

Bonk Bars

Prep Time: 20 minutes

Total Time: 20 minutes

Category: Snack, Healthy Treat, Power Snack

Cuisine: Vegan, Real food, Nutrient-dense, Vegetarian, Raw

Yield: 16 bars

Bonk-Bar-Stack-LG.jpg


Ingredients

  • 1 cup medjool dates

  • 1 cup almond butter

  • 1 cup oats

  • 3 Tbsp coconut oil, melted

  • ¼ cup sunflower seeds

  • ¼ cup sesame seeds

  • ¼ cup pumpkin seeds

  • ¼ cup shredded coconut

  • 3 Tbsp chia seeds

  • 1/4 tsp salt

  • 1/4 cup raisins

  • 1/4 cup chocolate chips

  • ¼ cup goji berries (mulberries/golden berries)

Instructions

  1. Soak dates in boiled water until soft (about 7-10 minutes).

  2. In food processor, combine dates and almond butter until smooth. Add oats and coconut oil and pulse until roughly combined. Transfer mixture to a large bowl.

  3. Add all remaining ingredients and combine.

  4. Pour into a lined 8 x 8 square pan and press down with wet hands until evenly distributed and smooth.

  5. Refrigerate for at least 1 hour before cutting into squares. Store in fridge.


If you try these Bars and love them (or not), let me know how they worked out for you!!

Love these? Want more recipes like this? Check these out:
Sesame Chocolate Power Balls

The Ultimate Cookie

Banana Oat Bars

Banana Oat Bars.jpg

Inspired by some very ripe bananas, a hungry family, and the need to have something on hand for either a quick breakfast or avoiding an afternoon crash, these bars are super easy to whip up, satisfying, and full of flavour. They are gently sweet and so moist, they might be able to pass as cake.  AND a little chocolatey goodness is always well received! A great recipe for little people, ravenous teenagers, and busy people alike. Enjoy!

Banana-Oat-Bars mine.jpg


Banana Oat Bars

Prep time: 15 mins
Bake time: 15-20 mins

Ingredients

2 ¼ cups oats
¼ cup ground flaxseeds
½ tsp baking powder
½ tsp baking soda
¼ tsp salt
1 tsp cinnamon
3 very ripe bananas
2 tsp vanilla
¼ cup applesauce
¼ cup honey
½ cup coarsely chopped almonds (or other nuts of choice)
¼ cup unsweetened dried coconut
1/3 cup chocolate chips

Chocolate Sauce:
3 Tbsp cacao
2 Tbsp coconut oil, melted
1 Tbsp honey

Instructions

  • Preheat the oven to 350F.

  • Place oats in your food processor and grind into a coarse flour. Place flour in a bowl and whisk together other dry ingredients.

  • Combine bananas, vanilla, applesauce and honey in your food processor and process until creamy. Stir into your dry mixture.

  • Stir in almonds, coconut and chocolate chips.

  • Pour into a lined 8 x 8 pan and smooth the top. Bake for 15-20 minutes until an inserted toothpick comes out clean and the edges are slightly browned. Cool.

  • To make chocolate sauce, stir together all ingredients in a small bowl and drizzle over bars. If the chocolate sauce is too thick, place bowl over a steaming pot of boiled water for a few minutes until slightly melted.

Feeding little (or big) hungry bellies something to feel good about!


Coconut Banana Muffins

Banana-Muffins-tray-.jpg

Our summer has finally chilled out enough to turn my oven back on and it’s good timing because my boys were craving some muffins and I was dying to create.  I also happened to have some pretty brown, fruit fly lovin’, bananas begging to be a part of something fantastic!

These muffins are vegan, gluten-free, and as sweet as brown are your bananas! (The browner the better). Note: if your bananas aren’t quite there yet, pop them in a brown paper bag overnight to quicken the ripening period.

Coconut Banana Muffins

single-muffin.jpg

Ingredients:

2 cups DIY gluten free flour blend (I use this one)
1 tsp baking powder
1 tsp baking soda
1/2 tsp himalayan sea salt
4 large, very ripe, bananas
1/2 cup coconut sugar
1/4 cup coconut oil, melted
1/2 cup coconut cream (if you don’t have any coconut cream, scoop off the cream from a can of coconut milk)
2 tsp vanilla extract
1 cup shredded, unsweetened, coconut (1/4 cup reserved)
1/3 cup high cacao content chocolate chips

Instructions:

  • Preheat oven to 350F. Line muffin tin with parchment paper or reusable silicon liners.

  • In a large bowl, combine the flour, baking soda, baking powder, and salt, and whisk together.

  • In a medium bowl, mash bananas with a fork. Add in sugar, oil, cream, and vanilla, and combine. Pour wet mixture into dry and stir with a large spoon.  Stir in 3/4 cup of shredded coconut and chocolate chips.

  • Spoon muffin mix into the tins and sprinkle with remaining coconut.

  • Bake for 22-25 minutes until slightly brown around the edges and an inserted toothpick comes out clean.

  • Cool completely and store covered with a dish towel to enable air circulation.

Note: I like to set half the batch aside to freeze for lunches and watch the others get devoured in just a few days. Enjoy!

Ginger Plum Crisp

Ginger Plum Crisp.jpg

It is Fall Harvest and plums are in abundance! This crisp is super simple but really really good. Gluten-free and made will all ingredients that live in my house, it’s an easy one to pull off for a dinner party, potluck, or just because there are loads of plump purple goodies begging to be baked! I served the leftovers to my boys in the morning with a dollop of coconut kefir and we all felt good about that!

plums-for-crisp.jpg

Print

Ginger Plum Crisp

Prep Time: 15 minutes

Cook Time: 45 minutes

Total Time: 1 hour

Category: Dessert, Breakfast, Snack, Tea time

Cuisine: Vegan, Real food, Nutrient-dense

Serving Size: 6

plum crips baked.jpg

Ingredients

  • 3 cups diced plums

  • 1 heaping Tbsp minced ginger

  • 2 Tbsp maple syrup

  • Good pinch of sea salt

  • For the Topping:

  • 1 cup oats

  • 1/3 cup oat flour

  • 1/4 cup slivered almonds

  • 1 tsp cinnamon

  • 1/2 tsp ginger powder

  • 1/4 tsp sea salt

  • 2 Tbsp coconut sugar

  • 1 Tbsp maple syrup

  • 3 Tbsp melted coconut oil

Instructions

  1. Preheat oven to 350F.

  2. In a medium bowl, combine plums, minced ginger, maple syrup, and sea salt. Spread evenly along the bottom of a small glass or ceramic baking dish (mine is 6 x 8).

  3. For the topping, combine all ingredients in your mixing bowl and spread over top of the fruit bottom.

  4. Bake for 40-45 minutes until edges begin the brown and you see the juices boiling along the sides.

  5. Serve with coconut whip cream or coconut vanilla ice cream.

The Ultimate Cookie

Ultimate Cookie.jpg

What makes a really good cookie?

And by good, I mean health benefiting, energy boosting, and super satisfying, just to be clear. A truly good cookie can be everything you want it to be AND make your body, mind, and soul happy.

What do we love most about cookies?  They’re chewy, sweet, salty, satisfying, and usually contain chocolate.

When constructing the healthy cookie, we can honour all of these delicious qualifications with a few simple alterations to the average cookie recipe.

Healthify Your Cookie:

  • Chewiness: something to hold your cookie together. Some good health benefiting suggestions: chia + water, ground flax +
    water, eggs, and nut butters.

  • Sweetness: oh so necessaire!! What’s key to gaining ground in the daily health challenge is to swap out those refined sweetness wannabes (and I mean permanently) for body-loving goodness such as honey, maple syrup, bananas, or dates.

  • Salty: this one’s easy! Just say no to iodized salt. For true mineral uptake and to receive actual nutrition from salt, choose good quality sea salt or pink himalayan salt.

  • Satisfaction: what makes a cookie’s satisfaction meter shoot through the roof is not the sugar and chocolate, my friends, it is the fat + carbohydrate + protein quotient. Using all 3 macronutrients in a power snack allows you to feel full longer, to keep your blood sugar levels stable, and to boost your energy and brainpower in a way that doesn’t mess with your metabolism. Some ideas: for good fat: coconut oil/nuts/seeds; good protein: nuts/seeds/hemp hearts; and good carbohydrates: oats/oat flour/almond meal/banana.

  • Chocolate: be choosy about chocolate! Real dark chocolate is full of beneficial minerals and antioxidants, but don’t let the store shelves fool you! There are many variations on chocolate out there will a LOT of added nonsense.  Find some dark goodies with as few ingredients as possible (3), look for cacao in the ingredients list and choose minimal sweetness.

Here’s my latest and most ingenious cookie recipe that I am so proud of and that my family and I did the kitchen happy dance for when I first took them out of the oven! The absolute bonus? They’re SO easy!

The Ultimate Cookie

ultimate-single-cookie.jpg

2 Tbsp chia seeds + 2 Tbsp water
2 ripe bananas
⅓ cup honey
⅓ cup almond butter
1 tsp vanilla
½ heaping tsp cinnamon
Good pinch of sea salt
¼ cup hemp hearts
1 ½ cup oats
⅓ cup raisins
⅓ cup chocolate chips

  • In a small bowl, whisk together chia seeds and water and let sit 10 minutes.

  • In a medium bowl, whisk wet ingredients together with a fork.

  • Add in dry ingredients and combine. Fold in raisins and chocolate chips. Form into cookies of whatever size you like and place on a parchment lined baking sheet.

  • Bake at 325 for 25 mins.

Vanilla Cashew Coconut Milk

cashew-milk-.jpg

Making your own nut milk has unending health benefits.
The store bought ones are mostly water, loaded with preservatives to extend shelf life, sweetened with added sugars, and bulked up with stabilizers and thickeners.

One of the most common additives we find in store-bought nut milks is carrageenan. There are piles of studies that link this preservative to intestinal inflammation, liver & colorectal cancers, as well as immune suppression and fetal toxicity & defects.  Packaged nut milks also tend to have the addition of health depleting vegetable oils and are often fortified with vitamins and minerals that are difficult to absorb and may stress the digestive system and the kidneys.

Making nut milk your self ensures that you know exactly what’s in there.

There is no processing that removes the nutrient qualities of the nuts (or the coconut in this case), you get to choose your quality of water, you may sweeten it with whatever you like or omit what you don’t, and the satisfaction just has no substitute.

It may seem overwhelming to think about regularly pulling off homemade nut milk to feed your family. But honestly, once you get into the groove of soaking the night before and allotting 10 minutes of blending and squeezing, it becomes something far more attainable than just giving it a pass because it’s easier to buy it. The benefits far out-weigh the hassleand it feels pretty good to watch your loved ones glug down your homemade goodness.

This here is our current most favourite day-to-day nut milk that we consume in our house. Feel free to swap in the nut of your choice or reduce the sweetness. I’ve been using cashews lately because they are creamy and more affordable than almonds, but this milk is wonderful with almonds.

Even if you are unable to keep up with the homemade nut milk demands, just give it a try a few times and see how it feels. My guess: it’s gonna feel pretty darned good.

Print

Vanilla Cashew Coconut Milk

Prep Time: 10 minutes

Total Time: 10 minutes

Category: Breakfast, Drink, Snacktime, Anytime

Cuisine: Vegan, Real food, Nutrient-dense, Vegetarian

Yield: 6-8 servings

jar milk.jpg
  • Ingredients

    • 1 cup cashews, soaked overnight

    • ½ cup shredded coconut, soaked overnight

    • 5 cups water

    • 2 medjool dates

    • 2 tsp vanilla

    • Pinch sea salt

Instructions

  1. Soak cashews and coconut overnight.

  2. Drain and rinse cashews and coconut.

  3. Place all ingredients in a blender and blend until smooth and creamy.

  4. Strain through a nut milk bag, squeezing as much liquid as possible, and transfer to a large glass container.

  5. Will keep for 3-5 days in the fridge.


Be the kitchen super star I know you can be.
Know what’s in your food & make it your self.

3 After-School Smoothies Your Kids Will Love

blackberry-smoothies-.jpg

Every parent is familiar with the after school blood sugar crash. The kids come home from school, rockin’ the grumps, dragging their feet, dumping their backpacks and mitts and hat and jacket and whatever else they’ve got all over the floor while they whine that they are SOOOOOOOOOO hungry! They “can’t handle anything” and must eat right this minute!
When you make a suggestion, they let out an exasperated sigh and give you the look of hangry death.

I hope you are laughing (and not crying) by now, because you’ve seen this a thousand times.

Well, fellow Feeding-Hangry-Kids Enthusiasts, I’ve got a plan for you:

Make it a smoothie.
In fact, let them make it themselves. 

We’ve been on the after-school smoothie train here for a while and let me tell you, it’s changed the atmosphere in our house considerably. Ok fine, so the dumping of all the clothing is still a work-in-progress (you got me there), but my son will often come in from school and head straight for the freezer. He’ll pull out whatever frozen fruit we have and line up some other tasty ingredients on the counter (often coconut milk, hemp hearts, almond butter, vanilla, cacao) and hit up the blender. It is such an effective way to nip the hangry quickly, deliciously, and plus, he’s become quite the smoothie maker (we are still working on the cleaning up part  ).

Here are some of our favourite recipes that have become staples over the last few years. I will often use these recipes with Kids Cooking Camps and after-school programs and the kids love to try coming up with their own creations. I believe that giving kids some reins in the kitchen early is a great way to set them up with the desire to cook. It also nurtures a more connective relationship with food and provides them with some basic guidelines for good nutrition & a general set of kitchen skills.

Good Morning Sunshine

1 ½ cup spinach (or other leafy greens)
1 cup coconut water
1 orange, peeled and diced
1 cup frozen mango or pineapple or a mix of both
Juice of 1 lime
Pinch of salt

  • Place all ingredients in your blender and blend until smooth.

Strawberry Shortcake Smoothie

1 cup frozen strawberries
1 cup coconut milk
¼ cup grated beets
1-2 handfuls of chopped spinach
2 Tbsp hemp hearts
1-2 Tbsp honey (optional)
1 Tbsp coconut oil
1 tsp vanilla

  • Place all ingredients in your blender and blend until smooth. Serve immediately. Makes 2-3 servings.

chocolate-smoothies.jpg


Afternoon Pick-Me-Up Chocolate Smoothie

½ cup coconut milk
½ cup water
2 Tbsp cacao powder
Pinch salt
½ – 1 whole banana
1 pitted medjool date
2 Tbsp almond butter
1 Tbsp coconut oil
A few ice cubes

  • Place all ingredients in your blender and combine until smooth.

Stay SMOOTH & Don’t let the After-School Hangrys get you down!

Like always, if you try these smoothies and love them, please let me know!!
Better yet, take a pic and tag me on facebook or instagram!

Looking for more healthy kid inspiration?