Raw

Blackberry Lemon Cashew Cheesecake

Blackberry Cheesecake (1).jpg

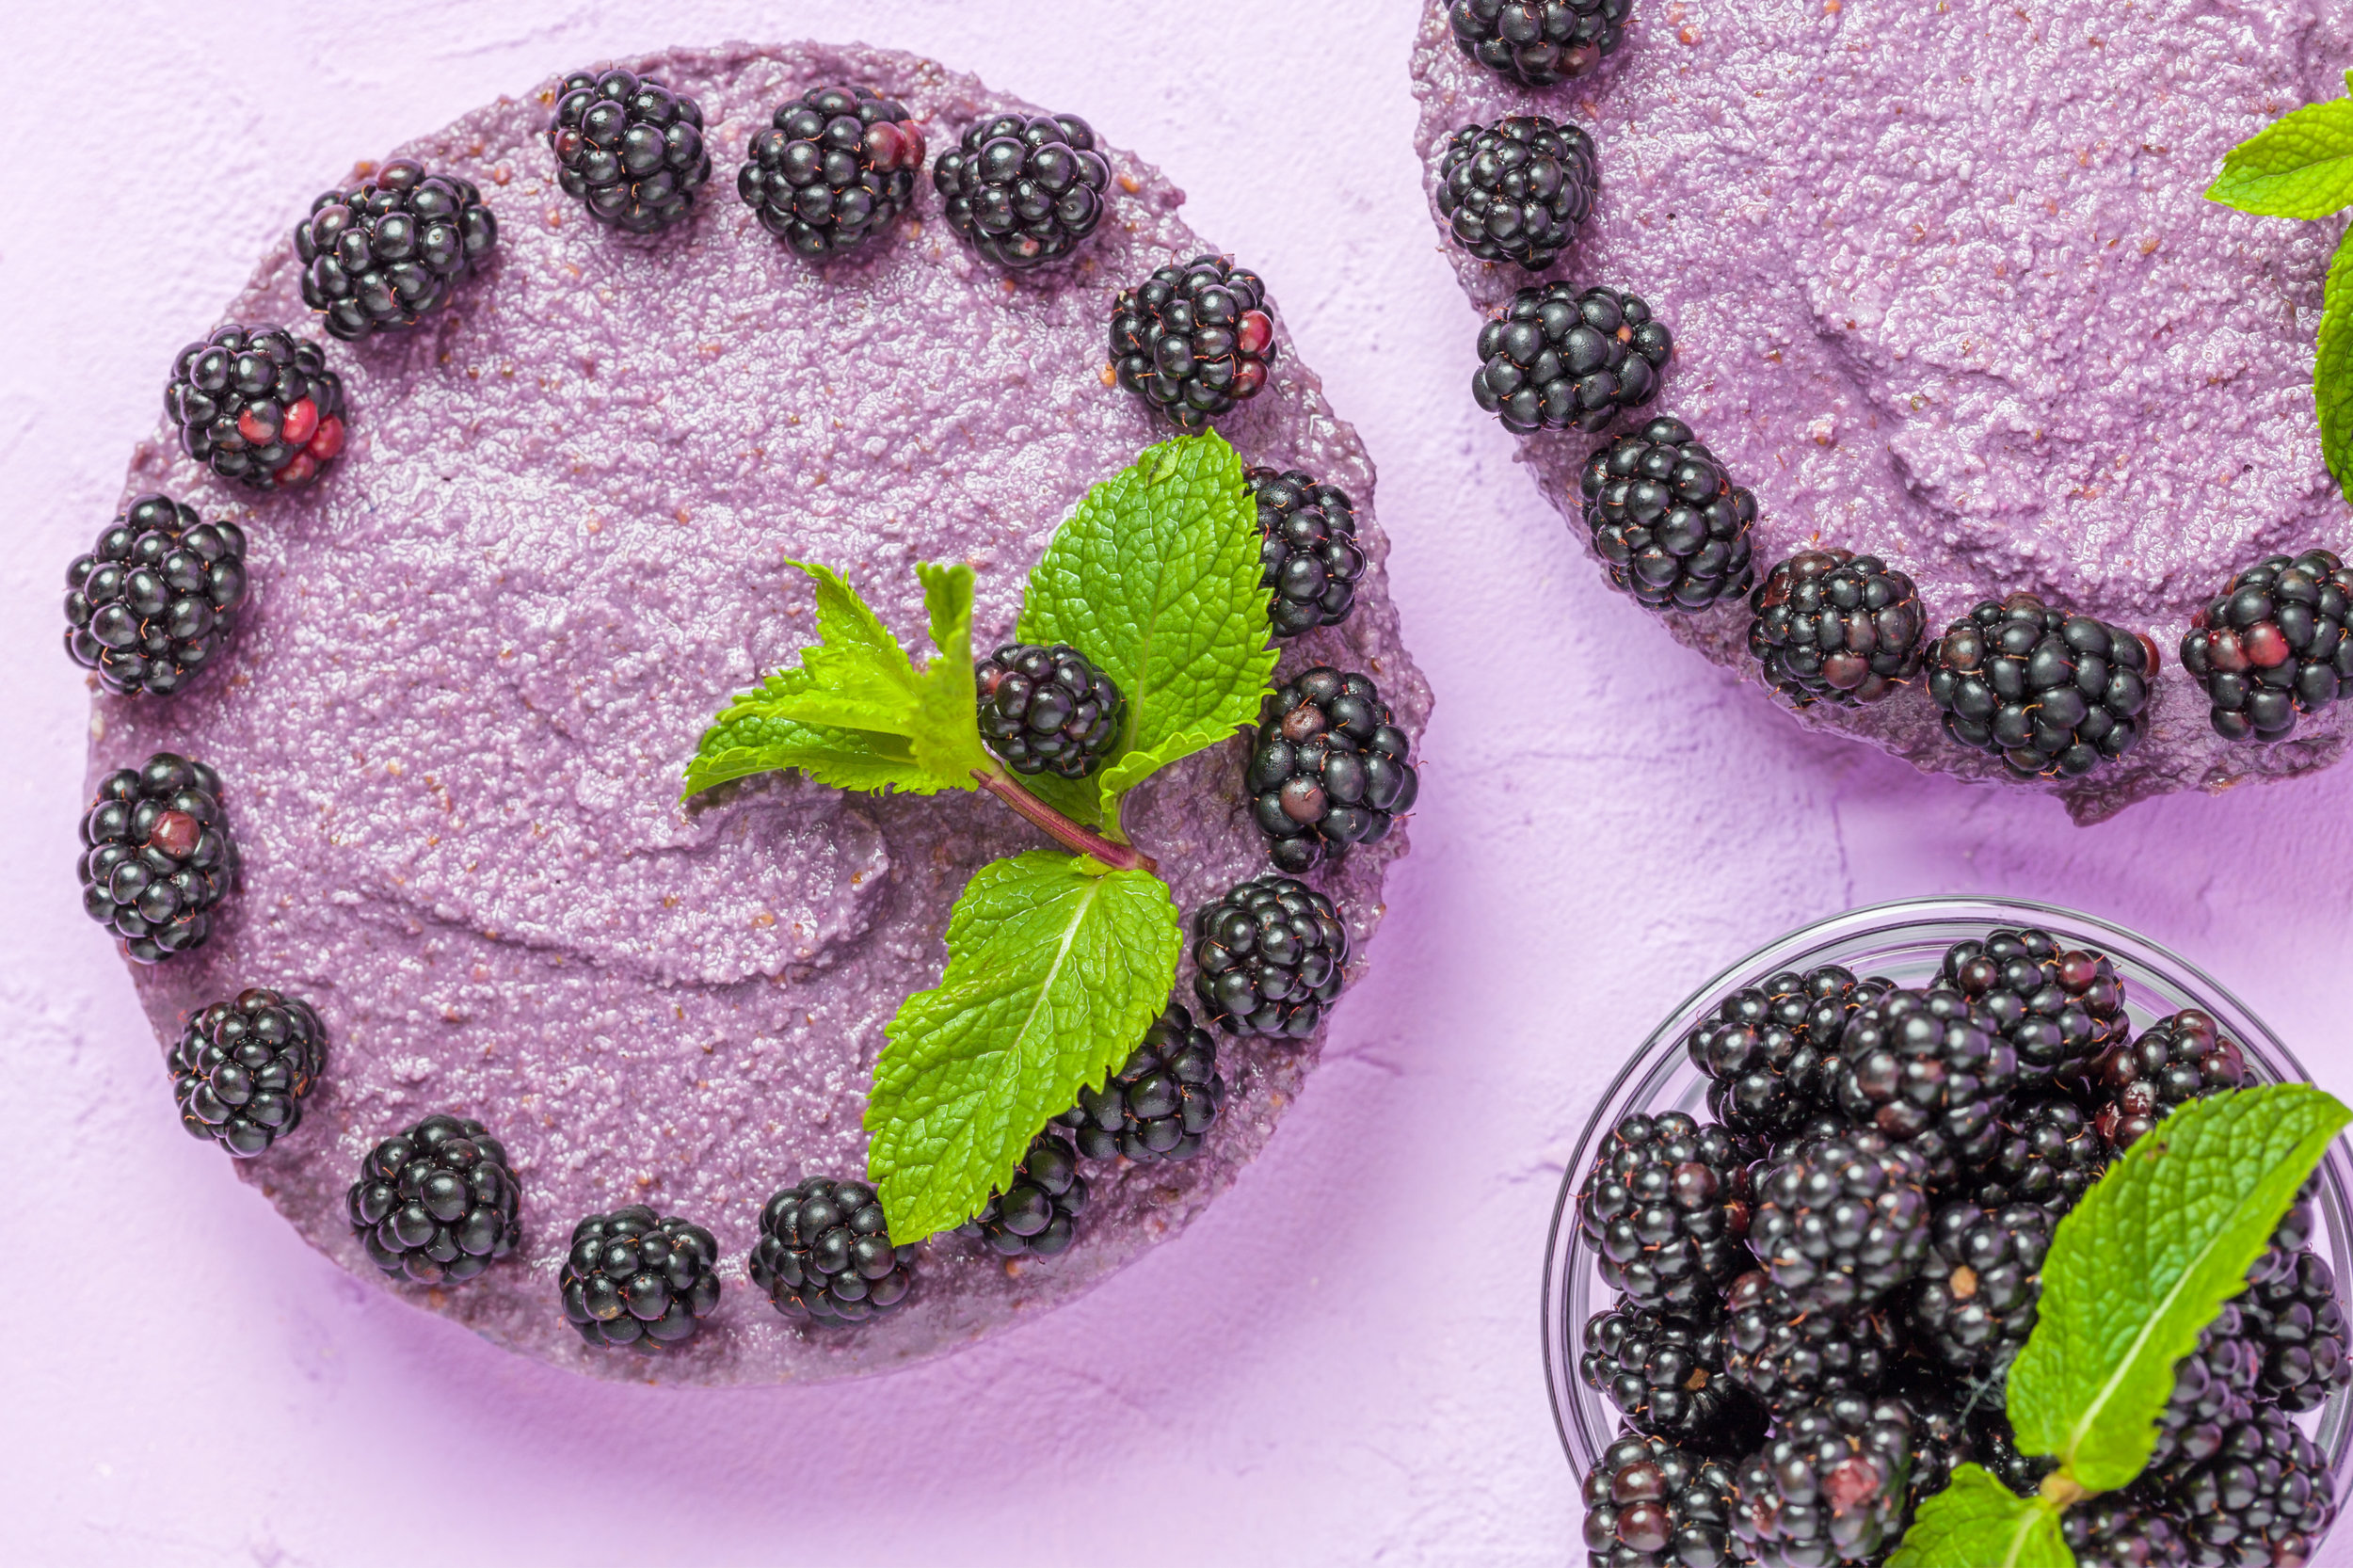
It all started with a vision (it usually does) of rich purple hues, a little tartness, a little sweetness, and a whopping load of flavour.  This recipe is really easy and loaded with high-quality, nutrient dense ingredients, which I love.  It finishes without the heaviness often accompanied by rich, sweet desserts and will leave you with energy as opposed to weight. I love this cake, it’s at the top of my list at the moment.  I just used this recipe at a Vegan Cooking workshop last weekend and it was a total hit!
The only warning I have for you is that this must be made the night before to allow time for the cashew filling to set.  I would slice it straight out of the freezer, but leave it to warm up a bit before serving.

Enjoy. Share. Or don’t. Above all, feel good about this one.

Lemon Blackberry Cashew Cheesecake

Ingredients

Crust:
1 cup medjool dates
½ cup pecans
½ cup almonds
¼ cup shredded, coconut
1 tsp vanilla
Pinch of salt

Filling:
1 ½ cups cashews, soaked overnight
1 cup blackberries
1/3 cup fresh lemon juice
1/3 cup maple syrup
1 tsp vanilla
¼ cup coconut cream (from a can of coconut milk)

Instructions

  • To make the crust, combine all ingredients in your food processor and process until well combined and mixture sticks together. Press into the bottom of a lined 7” round spring-form cake pan. Place in the freezer.

  • For the filling, combine all ingredients in food processor and process until smooth (this make take several minutes), scraping sides. Pour over crust and gently tap cake pan to settle ingredients. Place in the freezer overnight.

Not much more to say about this one, but ENJOY!

If you try this recipe, please leave a comment below and let me know how it went!

Curried Sunflower Seed Spread

sunflower-dip-w-crackers-.jpg

Here’s a pretty simple, easy to bang-off, “dinner party impresser” of a spread.  The only real pre-emptive here is that the sunflower seeds need to soak for a few hours before hand.  I love to use seeds as a base for sauces, dressings, and spreads, because they are nutritional powerhouses, high in protein, and super satisfying.  I’ve got big respect for the sunflower seed; they make great seed butter, are high in magnesium, vitamin E, selenium, support the cardiovascular system, help regulate mood, and are an excellent source of good quality fat.

Note: always keep your seeds refrigerated to preserve the integrity of the oils and to keep them fresh and tasting scrumptious.

Curried Sunflower Seed Spread

Ingredients

1 cup sunflower seeds, soaked 2 hour minimum
1 cup carrots, roughly chopped
1 inch fresh turmeric, minced
1.5 inch fresh ginger, minced
1/3 cup cashew butter
1/2 tsp salt
1/2 tsp curry powder
1/4 tsp cumin
1 Tbsp tamari
Fresh ground pepper to taste

Instructions

  • Drain and rinse sunflower seeds and place them in the bowl of your food processor along with all other ingredients. Process until smooth (this will take about 5 minutes), scraping sides frequently with spatula.

  • Serve with chopped veggies and homemade crackers or use as a filling in a tortilla or nori wrap.

  • Will keep refrigerated for up to 7 days.

Sesame Chocolate Power Balls

Sesame-Choc-balls-.jpg

These little babies were inspired by the need for more protein packed lunchbox snackeroos for the little kiddos who can’t pack nuts in their lunches due to school specifications. I came up with these easily, as they’re super quick to whip together, they contain staple ingredients that live in my kitchen, and I love love love the combo of sesame and chocolate: salty-sweet-earthy deliciousness!

Designed with the littles in mind, these are full of protein, beneficial fats, fibre, calcium, magnesium, and immune boosting antioxidants, they are perfect for an afternoon boost without the blood sugar crash of refined sugar. They are not to be reserved just for your kids though, so hide a couple in the back of the fridge and try them out mid-afternoon when you’re feeling sluggish and unfocused, they are sure to satisfy in many ways! Enjoy!!

Sesame Chocolate Power Balls

Yield: 12 - 16 Balls

Sesame-ball-single.jpg

Ingredients

  • 1 c dates, soaked in hot water for 10 minutes

  • 1/2 cup raw tahini

  • 1/4 cup hemp hearts

  • 1/2 tsp salt

  • 1/2 cup cacao powder

  • 1/4 cup dried cranberries

  • 1/3 cup toasted sesame seeds

Instructions

  1. Toast sesame seeds in a hot, dry, frying pan over medium heat until lightly brown. Remove from heat and empty onto a small plate and set aside.

  2. In a food processor, combine soaked dates, tahini, hemp hearts, salt, and cacao. Blend until smooth and well combined.

  3. Add dried cranberries to processor and pulse a few times until they are incorporated, but not blended.

  4. Using clean hands, roll 1-2 tbsp of mixture in your hands until a smooth ball is formed. Roll each ball in toasted sesame seeds until completely coated (or just coat half). Place onto a cookie sheet.

  5. Place finished balls into the fridge until firm (2-4 hours). Store refrigerated. Will keep 3-4 wks in fridge or 6 months in the freezer.


Be sure to let me know how these work out for you!

Layered Lemon Chocolate Cheesecake

Layered-cake-side-.jpg

Creamy Coconut Lemon Filling meets Avocado Chocolate Mousse.
Oh.
Yes.

This cake not only looks spectacular, inciting noises of mmm’s and ahh’s, it is also quite easy to whip up. It’s not overly sweet, which I love, the decadence takes care of providing so much flavour and nutrient density, that extra sweetness is just unnecessary. As with all raw cheesecakes, you do need a little fore thought, as these decadent desserts need to set overnight in the freezer. I will usually make a layered style cake like this on a day when I’m puttering around the house or am doing some batch cooking or prep. It’s best to let each layer harden before adding the next, so don’t rush this process.
Do feel free to make this style of cheesecake your own, depending on what you have on hand or what’s in season. You may feel like adding a cup or so of fresh raspberries or peaches to the middle layer or covering the chocolate mousse with toasted coconut flakes and raw cacao nibs. Note on the chocolate mousse layer, this also makes an incredible icing - you can increase the sweetness a little, if you like, and use it as a chocolate frosting for cupcakes or chocolate cake 😋. Definitely be careful not to leave it unattended on your kitchen counter, as it may gain some finger marks or mysteriously lose volume….
Any which way, I have ultimate confidence in the satisfaction level of this layered beauty.
However you make it, share it, and be sure to savour every bite!

Layered Lemon Chocolate Cheesecake

Prep Time: 35 minutes
Total Time: 35 minutes + 1 hour 20mins for freezing time
Category: Vegan, Dessert, Cheesecake, Decadent
Cuisine: Vegan, Real food, Nutrient-dense, Vegetarian
Yield: 10-12

Layered-chz-cake.jpg

Ingredients

For the Crust:
1/2 cup pecans
1/2 cup almonds
1/2 cup shredded coconut
1 cup medjool dates (or other soft dates), pitted
2 Tbsp raw cacao nibs
1/4 cup cacao powder
Good pinch of salt
A little water if needed (2 Tbsp)

For the Cashew-Lemon Cheesecake:
2 cups soaked cashew pieces (soaked at least 4 hours)
1/4 cup fresh lemon juice
1 cup coconut cream
2 tsp vanilla
1/4 tsp salt
1/3 cup maple syrup/honey

Chocolate Avocado Mousse:
2 ripe avocados
1/2 tsp salt
1/4 cup melted coconut oil
1/2 cup cacao powder
2 tsp vanilla
1/3 cup maple syrup/honey

Instructions

  • For the Crust: Combine all ingredients in your food processor and process until a coarse meal forms (do not over-process or it will lose it's crunchy-goodness appeal). If the mix is quite dry, add a few Tbsps of water until it sticks together. With wet hands, press crust into a lined 8 x 8 springform cake pan. Place cake pan in the freezer for 10 - 20 minutes until set.

  • For the Cheesecake Filling: Combine all ingredients in your food processor and combine until smooth. This may take several minutes. Note: if it looks like the mixture has curdled, just continue processing, it will become creamy with a little patience. Pour over crust and return to the freezer to set for at least 1 hour.

  • For the Chocolate Mousse: Combine all ingredients in your food processor and combine until smooth. Pour over top of the hardened cheesecake and smooth top with a spatula. Return cake to the freezer and allow to set overnight.

  • When it is time to remove the cake from the pan, run a thin knife under very hot water and slide it along the sides of the pan. While still quite frozen, use this warmed knife method to cut the cake into slices. I recommend allowing the cake to soften before serving - rest on the counter for 15-20 minutes.

    *Notes: It is important to remember to soak the cashews overnight the night before. The cake will also need an hour to harden in between adding the cashew layer and topping with the mousse.